Noel Candle II

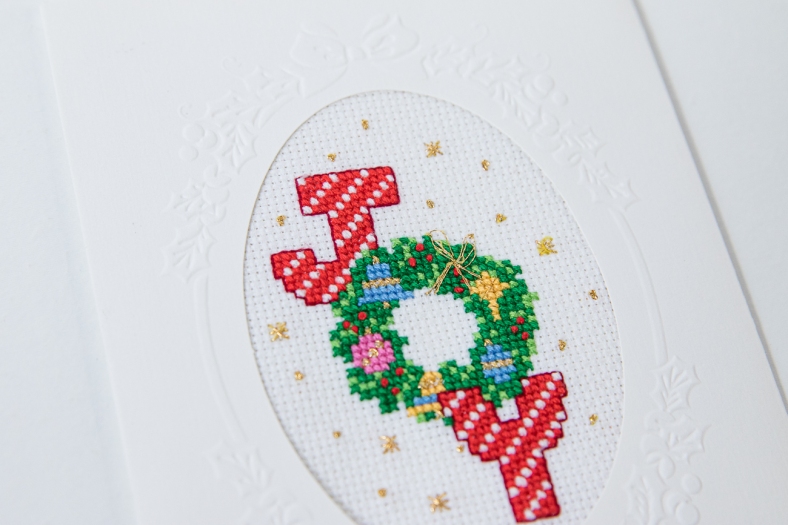
I made this kit in 2021 and ended up getting another one. It’s a kit from 1988. Everything comes ready to make the card, including the envelope.

The last version of this card ended up going to my uncle for Christmas. This one will be going with all my cards to a friend’s craft fair booth.

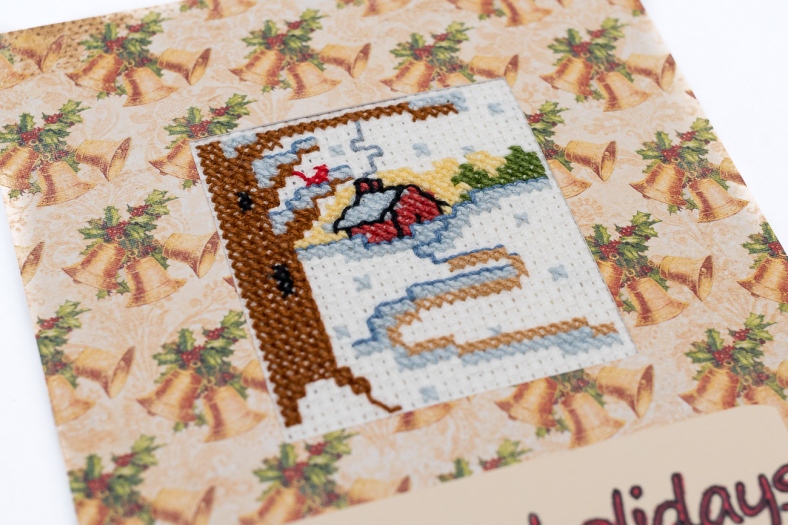
It’s a straight forward pattern, only a few quarter stitches sprinkled in. French knots in metallic thread is the challenge with this pattern. Looks awesome when done, but not easy getting there. Metallic thread makes me nervous I guess. I can have very dry hands and pick that stuff up and I’m sweating like crazy and the thread just frays. I ran it through thread magic several times which kept it together a little longer this time.

I do struggle with picking which color to work on each time I finish a general area. There is a fair amount of “confetti” in this one. To keep stitches consistent a little planning is needed.

Stitching

Started: September 16th

Finished: October 8th

Stitching time: 7.75 hours

Follow along on Snapchat
for current projects!

wp-1517196741806..jpg

Also now on Instagram @craftyk.3

70 is 13 in Scrabble

In a panic I realized my mother in laws birthday was a little under 2 weeks away. I had all these ideas for gifts months ago and decided it was too early to start. Now it’s a bit too late.

What sparked my memory was a box of sandpaper and little wooden squares my mom had me make for her friends who were turning 70 and 80 years old. She found a card idea on Pinterest and asked if I could make the letters with my Cricut and if my husband could cut out the squares.

I still had leftover squares from the flurry of birthdays and got them out to start my own card. Since my mom didn’t take a photo of her cards, she told me to head over to Pinterest to see what these cards looked like. I took it from there and made my own version of the card.

Follow along on Snapchat
for current projects!

wp-1517196741806..jpg

Also now on Instagram @craftyk.3

Winter Scene (Art. 126)

This cross stitch pattern is from a kit that was supposed to be made into an ornament. I’m not a Christmas tree person and personally have no need for ornaments and turned this into a card instead.

While the design is small and seems easy, it was more challenging than I expected. Not only is it tiny (and a tiny piece of fabric provided) it has quite a few colors. Along with backstitching to finish it off.

The card was a multi-step process. After picking the paper, I decided I wanted to make it a frame. Because the pattern is small and no words are stitched on it I also wanted to add some text.

I’ve acquired many stamps over the last few years, but I have avoided Christmas ones. With no stamp and not wanting to handwrite anything I chose to use the writing feature of my Cricut. Since I don’t pay for Access that means any font I use is outlined and not a single line.

I decided that wasn’t a problem because I recently bought alcohol markers and could color it in. In my head I just made my own stamp. The nice thing about that was more color options and testing colors before working on the final version. No cleaning a stamp between color tests!

For this card everything is heald together with double sided tape. Nothing too fancy there. I did use interfacing fabric to seal off the back of the cross stitch.

Stitching

Started: April 12

Finished: April 19

Stitching time: 4 hours

Follow along on Snapchat
for current projects!

wp-1517196741806..jpg

Also now on Instagram @craftyk.3

Mailbox Stamp and Color

This card is involves a few of firsts for me. A sort of first to start things off, I thought I was going to make 2 of these. Instead of my usual one-of-a-kind. I had a piece of paper to stamp on big enough to stamp twice. I tried, but I underestimated how much ink was left and had a really faded version 2.

It all turned out ok, I used that second try to test out colors.

  • First stamp that needs to be colored
  • First time using alcohol ink markers. (didn’t even know they were a thing until about a month ago)
  • First time adding a stamped message to the inside

I learned that maybe spending a bunch of money on markers that have an extra fine tip might be worth it in the future. Most of the areas are so tiny I couldn’t color in the lines very well. I bought a fairly cheap set on Amazon. The review compared them to the name brand kind that have tri-tips, these only have chisel and brush.

Here’s the inside. It came in the box with the stamp on the front. Based on the packaging I’m pretty sure they are Stampin’ Up. I’m sure others have used this set and made much fancier cards.

I also took a photo from the bottom to show the depth with the foam tape. The wallpaper and cardstock paper are taped down and the cardstock with the stamping and coloring is mounted with foam tape.

I think this card looks awesome and it’s part of my personal collection. Someday the right person will come along that I just have to send it to them.

Follow along on Snapchat
for current projects!

wp-1517196741806..jpg

Also now on Instagram @craftyk.3

Little Mouse

This card took a very long time in the making. I decided to stop assembling cards as I got things stitched. Little did I know this would take until the end of February to assemble and beginning of May to photograph for this blog!

In that time I did sign up on Instagram to show off cards this year. As I found a few people to follow I saw this cool thing of taking a baby food jar and storing thread scraps in it. I believe that person is keeping them all to put on display. For me it’s become the perfect portable trash can.

This is my tread scrap jar for the project.

To finish this card I used a page from one of those small books of scrapbook paper. I bought 2 Christmas themed ones and thought this page was a good fit. Since the mouse has a little Santa hat I thought the “HO HO HO” was good. I would have preferred it to be on the right, but this is how the paper comes. The words were in the far bottom left of the sheet. The mistletoe having the green to tie the two together in a second way.

The base of the card is white cardstock with the front being taped on with double sided tape. The cross stitch is adhered with a piece of foam tape. I didn’t get it cut out the greatest, but it works and looks ok.

Stitching

Started: October 31

Finished: November 6

Stitching time: 2 hours

Follow along on Snapchat
for current projects!

wp-1517196741806..jpg

Also now on Instagram @craftyk.3

2021 Cards

If you don’t want to read the nuances about the cards I created in 2021, this is where you can see them all by month of creation. Due to continued life circumstances there are very few cards created. You can also use this to get some inspiration for your own cards!

May

July

cards_0621_011

August

cards_0921_014

October

Craftyk

For real-time updates
follow along on Snapchat!

wp-1517196741806..jpg

Hocus Pocus cross stitch card

It’s been a few years since I bought the Halloween Special Edition of Just Cross Stitch magazine. This year’s inspiration buy was because of someone I recently got to know a bit better. We worked together at my day job until she left to start her crafting venture Uniquely Crafted.

Now that you have checked out her awesomeness, here is the card I made for her. The pattern came from the 2021 Halloween issue of Just Cross Stitch. She likes coffee and Hocus Pocus so this was perfect!

The original pattern was to be stitched on 28 count and would end up a little larger than a 5×7. I stitched this on 18 count to make it just under 5×7 to fit on a card.

The designer of this pattern did a great job with the colors for the word coffee. As someone I showed the finished piece to said, “very nice ombré.” It’s not variegated thread, it’s 4 colors. I barely had any left of one of the colors and managed to ration it just enough to have just a little leftover.

Since I changed the count this was supposed to be on the spiderwebs were extremely challenging to stitch. Lots of odd counting and trying to make new holes in the middle of things. They look awesome, but not fun when you go changing things around from what was intended.

Besides taking much longer to stitch than expected this was a fun project to make. For the inside of the card I added some pumpkin paper to bring some color to the card.

Stitching

Started: September 1

Finished: October 3

Stitching time: 19 hours 15 minutes

Follow along on Snapchat
for current projects!

wp-1517196741806..jpg

Christmas Cardinal cross stitch card

This card is from a 1988 vintage kit. I inherited from one of my mom’s friends who no longer cross stitches. Something new I am trying with this cross stitch and future ones are to track how much time they take me.

I’m sure you know the adage “when you’re having fun it doesn’t feel like work.” For me that applies to cross stitch. It’s something I enjoy, probably the longest running thing I’ve ever done. I’ve never really looked at how long it’s taken me. Honestly I was quite surprised at how long it takes to do even a smaller pattern like this.

Maybe to some this doesn’t seem small. I have done some fairly large cross stitch projects that take months of steady work which skews my perception. This is the third Christmas cross stitch card I have made. These are the first cross stitch cards I have made with no intended recipient. The concept of potentially selling these cards has been presented to me and you might be reading this because you saw the card, liked it, and have come here to read more.

Cardinal cross stitch, no backstitching or French knots

This cross stitch was straightforward. Almost all of the stitches are whole stitches. Very little backstitching. Quite a few French knots (at least none in gold metallic thread).

I used the Thread Magic again, it works ok. I still had quite a bit of fraying going on. I also snagged a cool idea from Instagram with storing the leftover thread pieces in a little baby food jar. This actually comes in quite handy when working on the go. I have a built in trash receptacle with me all the time. When I’m at home sometimes I forget and start stretching super far to reach the trash can only to remember I have something much closer. Due to lack of good lighting or access to my normal camera I didn’t get a photo of my jar for this project. Hoping next time I will!

Completed card, standing up

This kit came complete with the trifold card with embossed frame and envelope. I was able to easily get the card assembled. This time I did not use any backing on the cross stitch.

Stitching

Started: July 16

Finished: August 31

Stitching time: 7 hours 45 minutes

Follow along on Snapchat
for current projects!

wp-1517196741806..jpg
Card only no background

Noel Candle cross stitch card

This card wasn’t too bad to make. I had several delays getting it assembled due to house construction. It’s hard to make time for everything or have motivation in general to work on things.

Like the last cross stitch card this came from a 1980s kit. Everything comes ready to make the card, including the envelope. Due to life circumstances I decided to work on these cards since I need access to minimal materials to finish them off.

With this card I ended up searching for something to help with the metallic thread. There are several french knots in this pattern that are all to be done in metallic thread. Problem is, it frays and gets caught on itself when pulling the knot through. I ended up searching a cross stitching group on Facebook that I’m in and found someone recommended “Thread Magic.” A store locally had it and I had some money left on a gift card to use there so I ventured out to get some of this stuff.

It wasn’t as magical as I had hoped. I ran the metallic thread through the tiny container at least twice and it still had trouble staying together and being “smooth” when making the knot or pulling through the fabric. Since I have it I will probably try it again on future projects in hopes that it will be a more successful venture.

Overall I think the card turned out nice. I’m not sure what to do with these, but they are now in my inventory of cards pile.

Stitching

Started: May 23

Finished: June 20

Follow along on Snapchat
for current projects!

wp-1517196741806..jpg

Class of 2021

It’s finally here! My second project finish of the year. This was a super fast project that I designed myself. The font did need to be tweaked after typing in the text to make it look right. If you would like to see the first graduation project I did for her sister a few years back, you can find that post here.

I somehow managed to make the triangles different on the pattern and had to fix as I went while stitching.

My niece is into grey and pink right now, but her school colors are dark blue and grey. I compromised with the triangles standing in for school colors and the text using a variegated pink thread. I didn’t plan for the 21 to be the darkest part, but I’m not mad that’s how it turned out.

To keep with the light and neutral theme I chose a white frame for finishing.

Stitching

Started: March 11

Finished: March 18

Follow along on Snapchat
for current projects!

wp-1517196741806..jpg